# Other Experiments
This page describes some smaller experimental projects I did.
# ESP32 Wifi calculator
When I need to calculate something I still prefer to use my old TI-83 graphic calculator (opens new window) I got from high-school. Eventhough the thing looks a bit old schoolisch it has clear advantages to me compared to other scientific calculators or app based tools.
Advantages TI-83:
- With its real buttons it feels much more intuitive and faster than something that uses a touch screen.
- It doesn't need to boot up or require any loading time. It is fast and you have it right at hand.
- It works great as a compagnion tool since it doesn't need an extra window or on your computer / phone. It comes with its own screen. It is a standalone device.
- You can work on it for a whole month without changing or recharging batteries. A "smartphone calculator" will last one day or so.
- You easily pick it up, do some calculations and when not needed you just throw it somewhere. No laptops or phones required.
- Last but not least: you can program it! I have spend a considerable portion of my highschool creating silly games on the TI-83.
When I recently decided to recap some of my math I was wondering if it would be possible to use Javascript or Python libraries to assist me doing that. I was dreaming about my TI-83 to understand modern scripting language with advanced math libraries and to do some api request to pull data from external sources 😉 But there is no such thing! Not to my taste anyway, so I decides to create something for myself...the ESP32 wifi calculator.
The ESP32 wifi calculator consists three steps:
- By pressing the buttons the ESP32 builds up a string of the calculation to be done.
- When the user hits "enter" the ESP32 sends the string to an online service that respons with the answer.
- The answer is presented to the user on the display
Pretty simple right?
The current prototype already works with all the basic functionality needed for basic calculations. The cool thing is that the real calculations aren't actually done within the device itself but on 'da cloud". Even cooler is that the ESP32 with C++ arduino is a relative simple device and when it sends something to a server it doesn't matter how complicated the string is. Meaning it can do actually highly advanced math stuff even a modern "stand alone" device could never do.
Components:
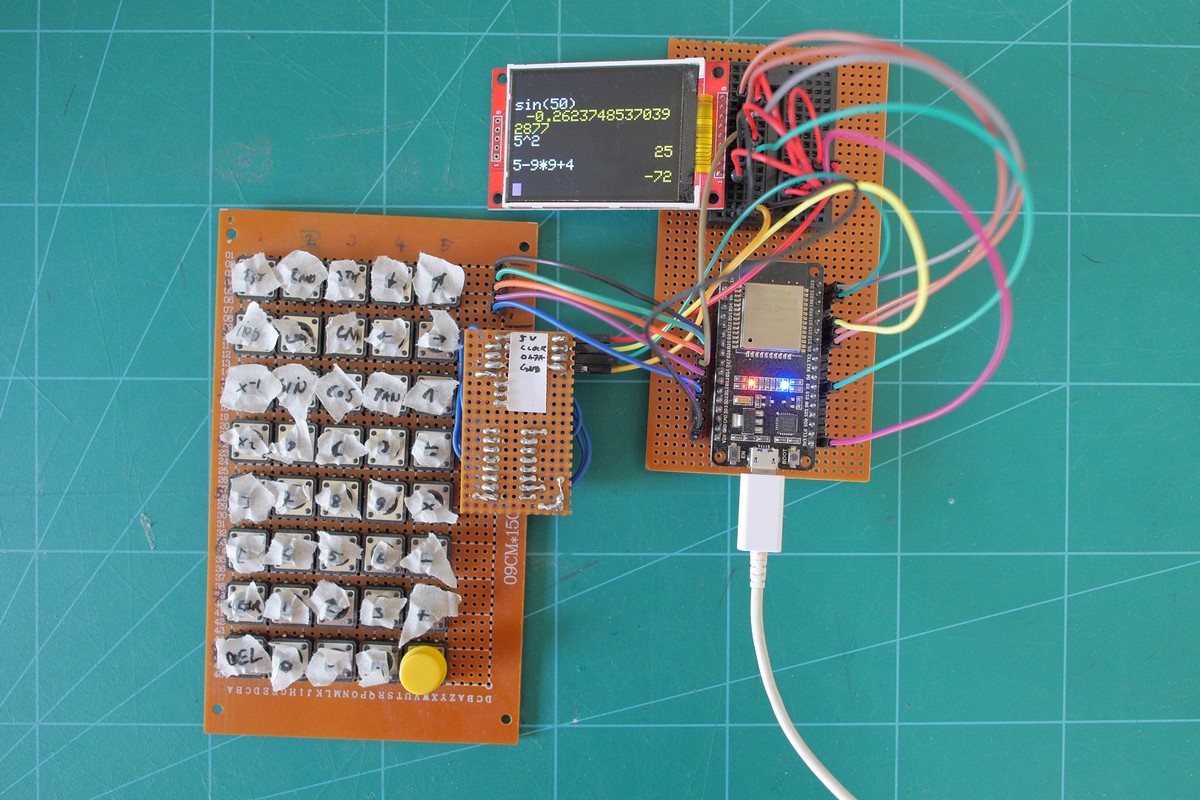
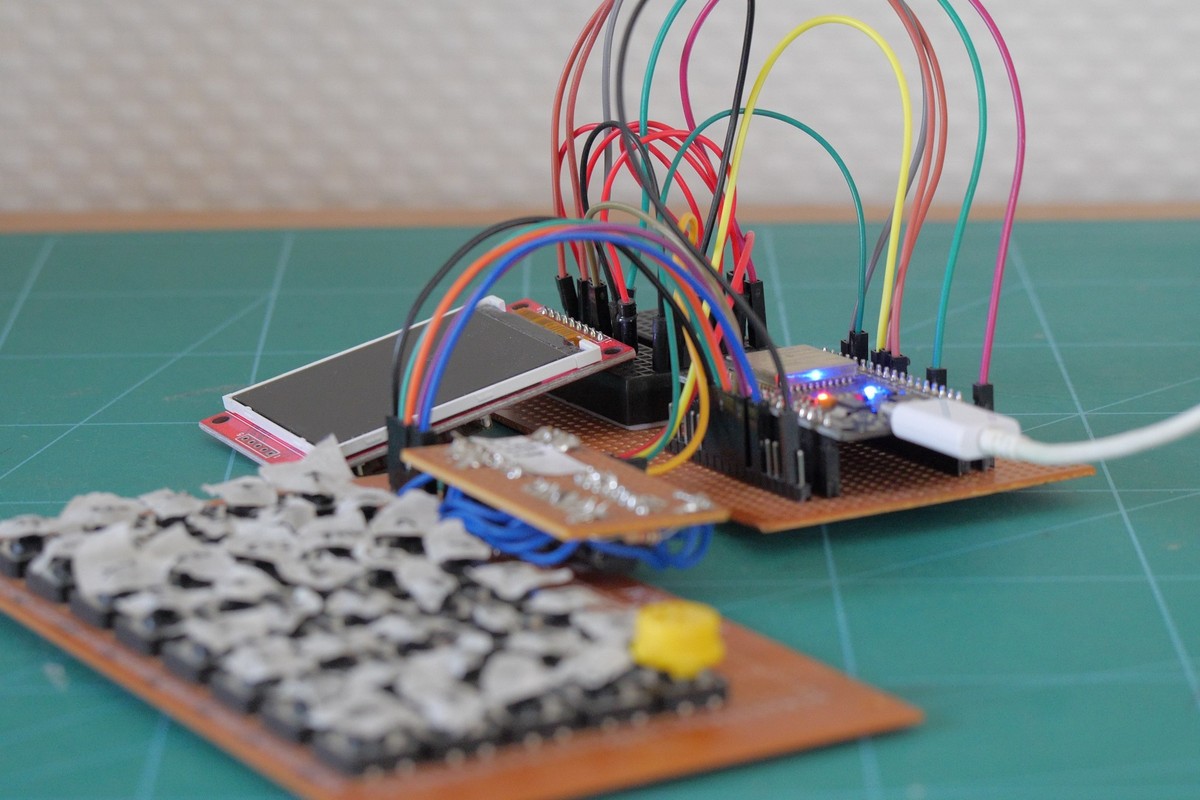
- ESP32; The ESP32 is an Arduino like microcontroller that understands user inputs and can send data to a display. Evenmore the ESP32 can communicate with the web thus it is able to send and request data to and from online services.
- 40 buttons; To read 40 buttons with only 7 data wires I have used a shift register and a basic button 8 x 5 matrix setup. The 40 buttons can furthermore alterate between different states like pressing shift on a keyboard. By this 120 expressions are currently mapped.
- A nice color display.
- An API server; For now I am using the super aswesome math.js (opens new window) library. It is an online math library written in Javascript that can handle api requests. Math.js is super fast since there is no noticable delay between entering and receiving the calculations. With this you can do much more advanced stuff than my old TI-83 can do! It is awesome! ps, also take a look at mathnotepad.com (opens new window).
The project is not yet finished. I has no graphical capabilities yest. I will design a real pcb and 3d print a casing. Later I will share the code on github.
# DIY wake up light
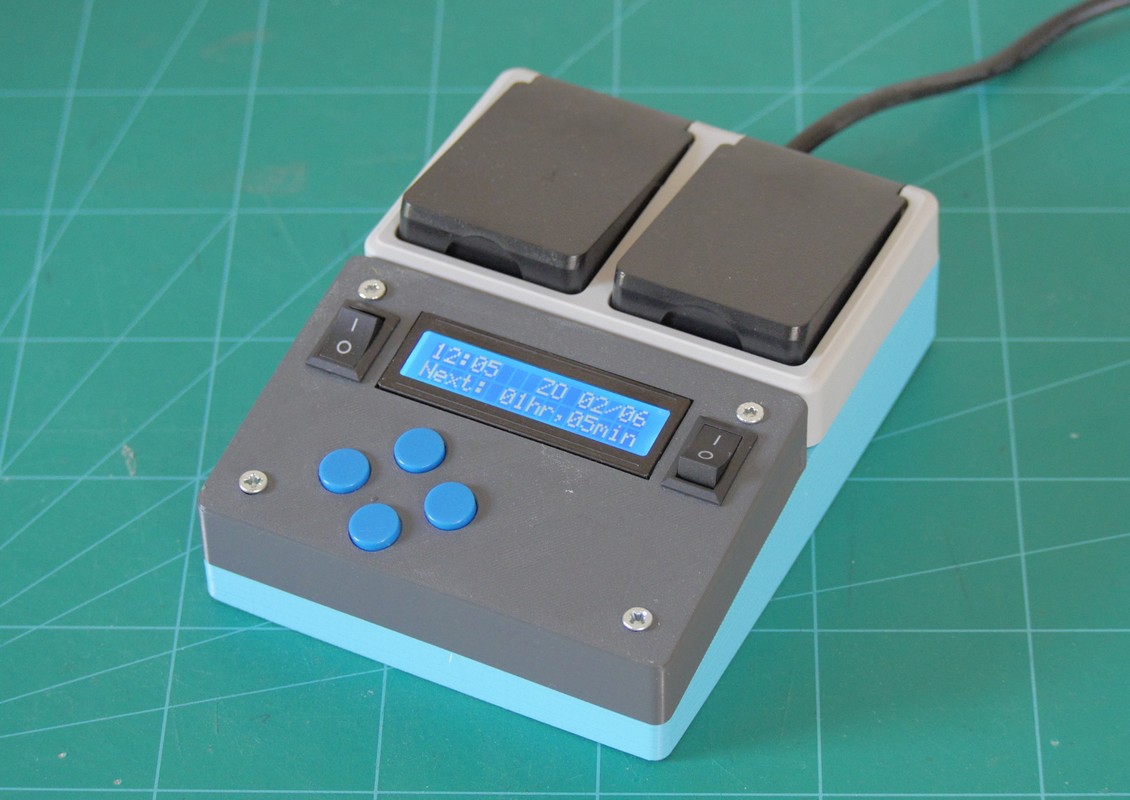
During winter I want to wake up in the morning with some light next to me. It would help me to get out of bed. The 'Wake up light' from Philips is doing that exact thing, however I rather fashion a DIY version that simply works with a relais so it can also automate a coffee machine 😉
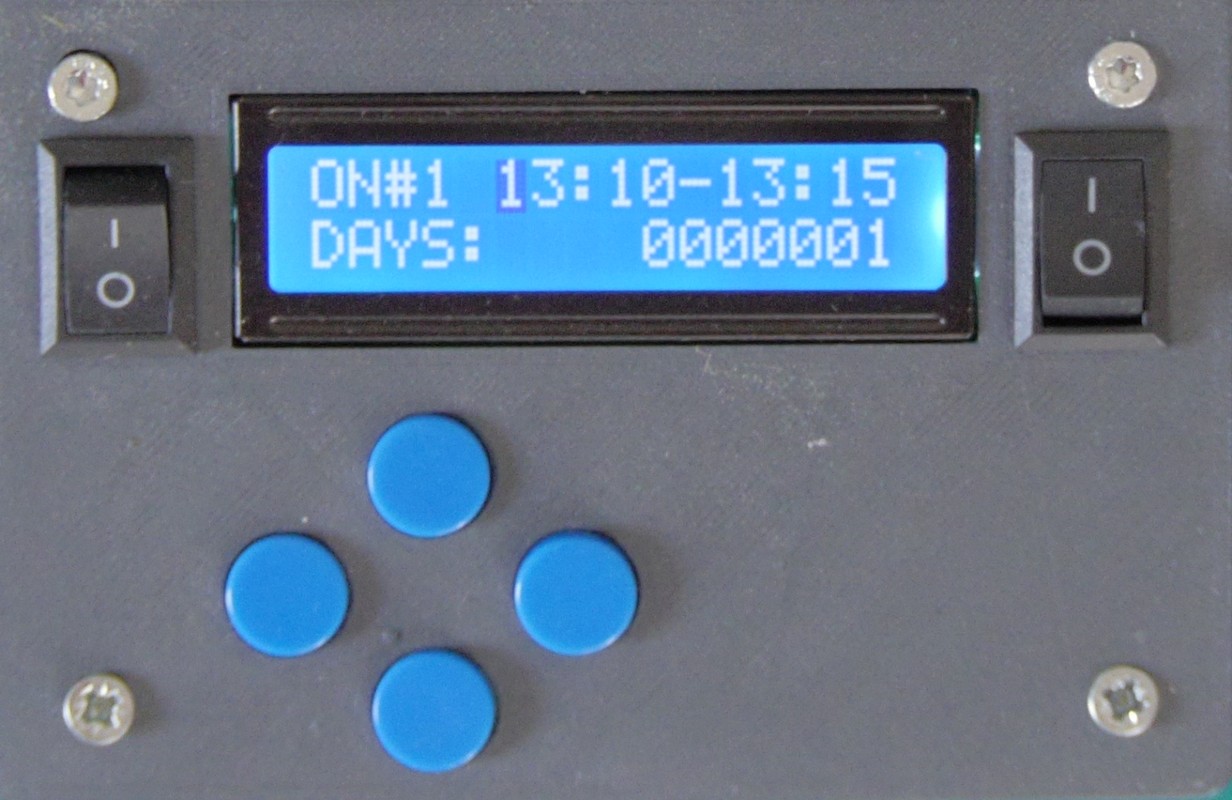
With the prototype I have build you can set a starting time and ending time and apply this to certain days. In the example above the device turns on between 13.10 and 13.15 on sunday...just because. For my morning routine I set it between 7 and 7.30 and of course only the week days. Furthermore it has a switch for turning on or off the display ( I don't like lit up displays in my bedroom), and it has a switch to bypass the relais (if you don't want to wait for your coffee).
Parts:
- 3d printed housing
- wall outlet (parts of it)
- arduino nano
- rtc timer with battery
- relais
- AC-DC (5 volts) converter.
- 16x2 segment lcd
- buttons and switches